Saturday, November 23, 2013

Homemade Canning Gifts: Day Five- Vanilla Pear Butter

The last canned gift I made was vanilla pear butter.  It was a small batch that only gave me about 4 jars.


Vanilla Pear Butter
I didn't really use a recipe, but this one closely resembles what I did.

2 lb pears, peeled, chopped
juice of 2 lemons
1 1/4 cups water
1 vanilla bean, split
3 1/2 cups sugar

Directions:


1. Place the pears in a large pot with the lemon juice, water and vanilla pod; cover and simmer for 10 minutes. Then uncover and cook for 20 minutes more or so, until the pears are soft.
2. Remove the vanilla pod from the pot and scrape the seeds into the pear mixture. Blend the fruit with the appliance of your choice until it becomes a smooth purée.
3. Now measure the amount of purée you have, as you place it back into the pot. Add half as much sugar as there is purée (e.g. if you have 4 cups of purée, add 2 cups of sugar.) Stir over low heat till the sugar dissolves, then increase the heat and bring to a boil.
Meanwhile, put the jars and lids on a baking tray, place the tray in a cold oven, turn the oven on to 225 F, and bake the jars for 30 minutes to sterilize them.
4. Boil for 25 or so minutes, or until the mixture is quite thick and somewhat golden.
5. Take the jars out of the oven and ladle the hot butter into the hot jars. Wipe the rims with a clean, damp cloth, and put the lids on immediately. Process the jars for 20 minutes in a water bath.


I love giving homemade gifts at Christmas, plus that means no waiting in line!  Bonus!

Homemade Canning Gifts: Day Four- Carrot Cake Jam

(I've had some computer issues, so sorry for the delay!)

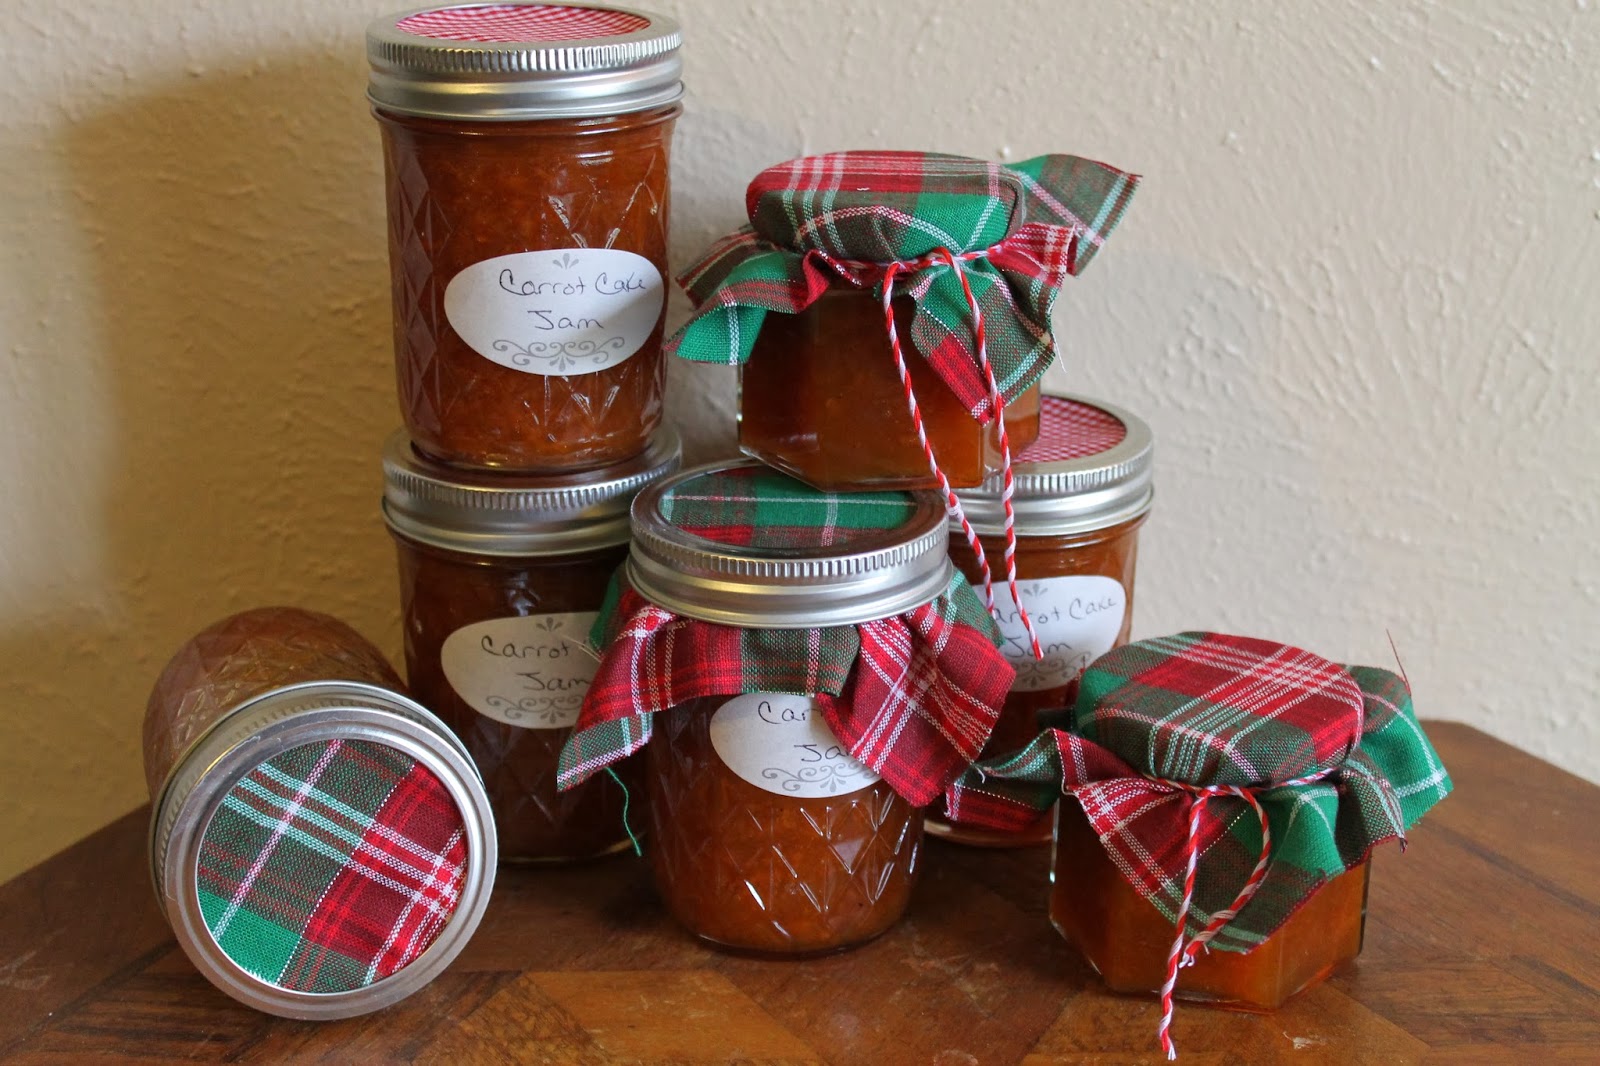
As I mentioned in an earlier post on spicy pickled carrots, I had an alarming number of carrots that I needed to use quickly before they went bad.   Enter Carrot Cake Jam.  Although this recipe was on my list to do one day, I found myself moving it to the top of the list an effort to use up said carrots.

Carrot Cake Jam


Carrot Cake Jam

I followed this recipe exactly, except for the whole pectin fiasco.  So, I just left the jam to simmer, until most of the liquid cooked out.  Works every time!

Next Up:  Pear Butter

Sunday, October 27, 2013

Homemade Canning Gifts: Day Three- Apple Butter

I prefer fruit butters to normal jams/jellies, but they require SO MUCH FRUIT, I usually only do small batches.  Last year I made a small batch peach butter that was so freakin' fantastic, I only gave away 2 jars and kept the other 2 for myself!

I used a slow cooker recipe for this particular batch.  The only real benefit of the slow cooker method, in my opinion, is that I didn't have to watch a pot on the stove all day, which actually means a lot to me.  So, I may be doing this method more often.


Slow Cooker Apple Butter
recipe slightly adapted from here

Ingredients:

6 1/2 lbs apples, peeled, cored and sliced
1 c. sugar
1 c. light brown sugar, lightly packed
1 T. ground cinnamon
1/2 tsp. grated nutmeg
1/4 tsp. salt
1 T. vanilla

Directions:
  1. Place apples in slow cooker.  In a medium bowl, combine sugars, spices and salt.  Pour the mixture over the apples and mix well.
  2. Cook in the slow cooker on low for 10 hours, stirring occasionally, until the mixture is thickened and dark brown.
  3. Uncover, and stir in vanilla.  Continue cooking uncovered, on low, for another 2 hours.
  4. Use an immersion blender, or transfer mixture to a regular blender, to puree the apple butter until smooth.
  5. Transfer to jars and process in a water bath for 10 minutes.  Or, refrigerate for up to two weeks.
Bench notes:
- I used Gala apples, because that's what was on sale!
- I used a regular blender to puree the apple butter.  Just be sure to transfer in small batches, and to leave the top off the lid and cover with a towel.  (Hot mixtures like to explode in blenders, if the steam can't get out.)
- The original recipe called for 1/4 tsp. cloves, but I think anything more than a flake of cloves is too much, so I omitted it.


Up next:
Homemade Canning Gifts:  Day Four - Carrot Cake Jam

Tuesday, October 22, 2013

Homemade Canned Gifts: Day Two - Spicy Pickled Carrots

I recently found myself with an abundance of carrots, from a juicing experiment gone horribly wrong.  So, before I found myself with 10 pounds of rotting carrots, I thought I'd better put them to use.  My entire family (excluding myself) loves spicy foods, so I thought this sounded like the perfect solution.


Spicy Pickled Carrots
recipe slightly adapted from here

1 1/2 c. vinegar
1/2 c. water
2 tsp. sugar
1 Tbsp. salt
1/2 lb. carrots, sliced (some of the small carrots I left as sticks, and then I also shredded some to make a relish of sorts.  Totally up to you!)
1/2 lb. daikon radish or other veggie (I used purple radishes, cauliflower and okra)
6 jalapenos (I also used a couple of hotter peppers that I found)
1 onion, sliced
4 garlic cloves, slightly crushed
1 Tbsp. whole black peppercorns
2- 16 oz. glass jars with lids


  1. Prepare your water bath for canning.
  2. Wash your jars and lids in hot soapy water.  Let dry.
  3. Bring to a boil, vinegar, water, sugar and salt, until sugar and salt have dissolved.
  4. While your vinegar mix is cooking, wash and cut your veggies to your preference.  (Please remember to use caution when cooking with hot peppers.  I treat them like a contagion.  Rubber gloves, mask, protective eye wear, etc.)
  5. Fill each jar with the peppercorns, garlic and veggies.
  6. Fill each jar with the liquid and secure lids and rings to fingertip tightness.
  7. Process each jar for 10 minutes.  Place on counter to cool, and do the happy dance when all your jars have popped.


I had a LOT of carrots, so obviously I doubled and quadrupled this recipe, until all my vinegar was gone.  Poo.  Anyway, I came away with 15 half pint jars when the night was done, and still had enough veggies to do twice that again.  (sigh)

I did 2 jars of shredded carrots and radishes to make a relish.  These, I did not process in a water bath, but instead moved directly to the fridge for them to chill.  I'm imagining throwing the relish on a hot dog at some point.  I also did one jar of strictly okra, because I love me some pickled okra!  And, I did one jar of carrot sticks, instead of sliced.  All in all, I think it turned out well, and I hope it's a nice addition to the other gifts I'm making.

Check back with me tomorrow for-

Day Three:  Apple Butter

Monday, October 21, 2013

Homemade Canned Gifts: Day One- Amaretto Cherry Sauce

Hey there! Last year I gave out some homemade canned items as Christmas gifts, with notes saying to return the jar for a refill the following year.  SO, with Christmas not too far away, I figured I'd better get started.

Last year's jams:  Chocolate Berry, Peach Vanilla, Vanilla Mint


Last year was the first year I had ever canned anything, and I was super impressed with the results!  This year, however, I've had a few problems with pectin.  Basically, it doesn't seem to want to firm up the jams.  No matter though, I just cooked the jams until they were thickened.  Problem solved!

First up:  Amaretto Cherry Sauce
(I say sauce, because as previously mentioned the pectin did not seem to firm up the mixture.  I could have opened up the jars and cooked the jam again, but I chose to keep it as a sauce instead of a jam.)

Recipe slightly adapted from Hezzi-D's Books and Cooks

32 oz. frozen cherries
6 T. classic pectin
3/4 c. Amaretto liqueur (I used Disaronno, the best, in my opinion)
3 T. lemon juice
3 1/2 c. sugar


  1. Prepare your canner and jars.
  2. Combine everything but sugar in a large saucepan over medium high heat.  Bring to a boil, stirring frequently.
  3. Gently mash cherries.  (You can chop your cherries, as in the original recipe, but I wanted some larger chunks.  I used a potato masher to smash 'em up a bit.  If you wanted a finer consistency though, you could even run them through a food processor, or use a stick blender.)
  4. Add the sugar and stir well until it has dissolved.  Return to a rolling boil and boil hard for 1 minute, stirring constantly.  Remove from heat.
  5. Skim the foam from the jam and ladle the hot jam into the prepared jars, leaving 1/4 inch of headspace.  Remove any air bubbles from the jars, and adjust headspace.
  6. Wipe rims of jars with clean rag and put on lid and rings, tightening to fingertip tight.  Process in a boiling water canner for 10 minutes.  Remove from the canner and let cool.  Store for up to a year.

Voila!  Cherry Amaretto jam Sauce! I used a muffin liner and fitted it over the top, then screwed the ring on, for a little festive merriment!

Check back tomorrow for Day Two:  Spicy Pickled Carrots

Saturday, August 24, 2013

Heirloom Nativity Sampler update

Just an update to show the progress on my Nativity Sampler.  I don't really think it's a sampler in the traditional sense, but whatever.  That's what they're calling it.

 
As mentioned in previous posts, I'm doing two pieces at the same time.  So, the above picture shows both of them.  For this particular project, I am really loving these scroll frames that I found at Hobby Lobby.  Many of you may use them already, but I usually only use my spring hoop, so this was quite a change for me.  I still use my hoop for 95% of my work, however with the delicate nature of the stitching and beads on this particular pattern, I thought I needed something a bit less intrusive.

Top scene (so far)

Middle scene

"Lace" and bead work

Bottom scene (so far)


Still probably a third left to do on each one, but they're progressing and will be finished by Christmas.  As for my other projects I had planned this year, well......I'm not so sure.  I had an unexpected baby gift to do, so I pulled out a stocking I had already made and just stitched the name on real quick (along with an ironing mishap that forced me to do a little creative stitching on the pattern itself to cover up the bleeding red color.  Blasted iron!), then I whipped up a couple of bibs and called the gift complete.  The hardest part was actually turning the cross stitch piece into a stocking.  A experienced sewer I am not.


Hoping to finish the samplers sometime next month, then be able to knock out one more stocking before Christmas to finish the year.

Oh, and I'm looking forward to all the premiere's next month!  Love tv in the fall!

Thursday, August 15, 2013

Teenage Mutant Ninja Turtle Party - Part 4: Putting it all together

 The ultimate TMNT birthday party!!

Ninja balloons!
The Turtles!!

Ninja Turtle tattoos!
The gear!
The food!


We had some big and small ninja turtles that day, but oh, was it a blast!  This is definitely a theme I wouldn't mind doing over again to see what I could do differently.  So much fun, and the kids loved it!  Can't wait until next year!!
Follow Me